
New Blog
Overview
Over the last few years at Microsoft I’ve worked with a lot of people to help them out with Azure, and generally when I’ve solved a problem I’ve put the resolution in my public github. Unfortunately this isnt really the best place for that content..or at least the text side of it, so I decided to start moving this content over to a new personal blog.
The issue with setting up a blog, however, is that I had a lot of requirements.
Must….
- be a static content only side (I dont want to deal with a lot of complexity)
- be CHEEEEAAAP (I dont have a lot of cash to throw around here)
- support custom domain (So I can run under blog.stevegriffith.nyc)
- support custom domain TLS (gotta keep my visitors safe)
- be maintained in GitHub public
- auto sync on git push
Seems like a pretty reasonable list. So lets get into it.
Static Content
In order to minimize hosting complexity and cost I decided to go with a static site. I could have gone the WordPress route instead, but there are too many things that can break, and generally hosting cost for the web side and the DB side are too high. I want this thing to run for pennies a day…not dollars.
I’m not a web developer by heart, so I’m not about to build from scratch, so that leaves me looking for a static content generator. I’ve seen a few in the wild, but the two main that I’ve come across are Jekyll and Hugo. After some basic research, and after reading this interesting quick compare, I decided to use Hugo.
Setup is really quick. I’m an Ubuntu and Arch linux user on the personal side, so I just had to run the following…
#Ubuntu
sudo apt install hugo

#Arch
pacman -S hugo
…and from there I just followed the quick start from the Hugo site here to get started. I also browsed the themes and landed on this Dream Plus theme, which I found pretty nice. I may swap later.
Honstly….still getting comfortable with Hugo and this theme, so may chance out later, but its a solid start.
Hosting
Ok, so I work for Microsoft. I have access to Azure subscriptions for work, but this isnt a work blog, so I can’t use that. I do have an MSDN subscription, which I can use, but that has a pretty low spending cap, so cost efficiency is key.
I thought about Azure Web Apps, because it’s an awesome platform for hosting a web application, but once I added the need for custom domain and SSL I was looking at about $10/month…which is very low, but still dollars not cents. It also seems like overkill for a static site. Fortunately Azure Storage now supports static website hosting. This seems like a perfect fit.
Setup is pretty easy. You create a new Azure Storage Account (needs to be v2). I wont get into all the setup steps here, because the Azure docs are awesome. You can see the setup instructions here.
After you’re done you should have something that looks like this:

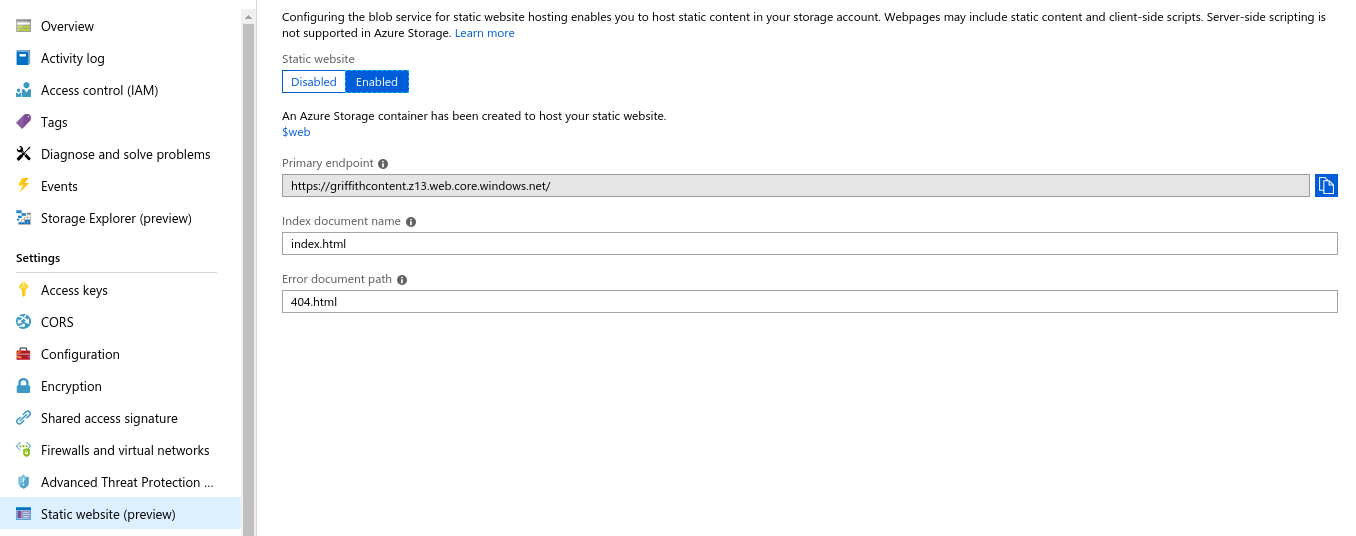
There are a few key points to note. First, after setting up static web hosting you will have a new $web container in your blob storage. No big deal, except that older versions of some storage tools you may find that non-alphanumberic characters are not supported. For example, my Azure DevOps pipeline, which I’ll cover later threw this error until I changed the file copy tool version:
[error]Upload to container: '$web' in storage account: 'griffithcontent' with blob prefix: '' failed with error: 'Azure Storage container names can only contain lowercase alpha-numeric characters or hyphens
The second point to note is that Azure Storage static content, at the time I’m writing this, does support custom domain but does not support TLS on those custom domains. As a responsible person I cannot compromise on HTTPS. If you’re thinking ‘its just static content…what could go wrong’ you should check out the ‘Here’s Why Your Static Website Needs HTTPS’ from Troy Hunt. Fortunately the Microsoft Azure CDN does support TLS and will create, deploy and maintain certificates for you. Again, I won’t run through the full setup here, as the Azure Docs are great, but here’s the rough steps you follow:
-
Setup the profile and endpoint following the guide here.
Note: Don’t use the ‘Storage’ orign type, as it wont let you point at the static website URL. Instead it will try to point at the blob storage URL, which is different. Use the ‘Custom’ origin type instead.
-
Create the CName record in your DNS provider to resolve to your CDN endpoint.
-
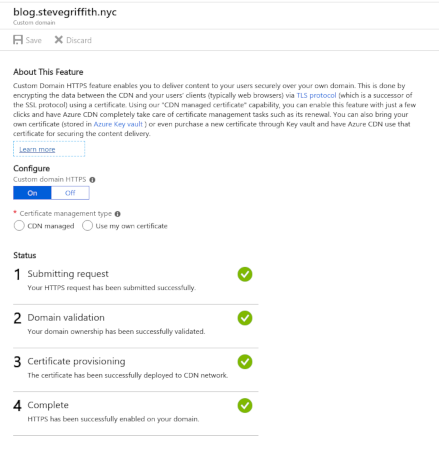
Configure the custom domain and SSL following the guide here. Once you’re done you’ll need to wait for the domain validation and certificate provisioning, shown below.
It’s ALIVE!!!
And that’s it! Now I have a super cheap static content blog running in Azure Storage ($0.002/GB per month and $0.01 per 10,000 read operations). The Azure CDN is giving me global CDN access and SSL ($0.081/GB egress per month for traffic to North America and Europe). I’ll have to monitor it for a few months to see if that cost break down holds up, but it looks good on paper. :-D
Git Push Automation
So the site is up and running, but I still need to make changes, run hugo to regen the site and then get updates deployed. I really wanted to do this via GitHub. I explored a few options:
- Initially I looked at GitHub Actions, and I may revisit, but I didn’t have much time to mess around.
- I thought about setting up a GitHub webhook into an Azure Logic App. After digging in I couldnt help but think it seemed way overcomplicated.
- Next I tried out Azure DevOps pipelines, and I had the thing up and running in 10 minutes (Hooray!).
Many people don’t realize that Azure DevOps has a free tier, which gives you unlimited public Git repos as well as the ability to have up to 10 parallel CI/CD pipelines running. It also doesnt require you to use Azure DevOps as the source repo. You can actually link a CI/CD pipeline directly to your GitHub or GitHub Enterprise accounts.
So here we go…
Step 1
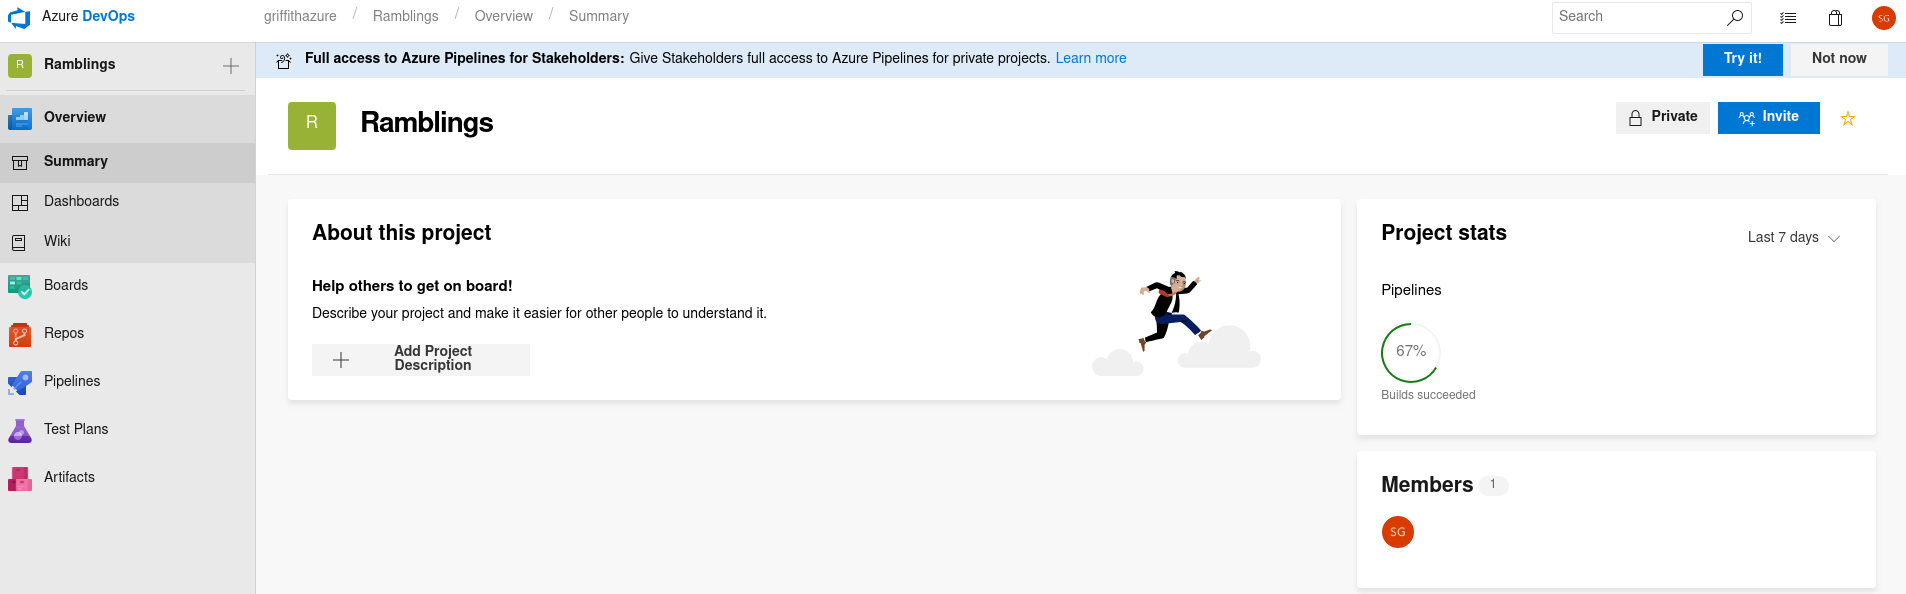
I already had an Azure DevOps account, so nothing to do there. I just went in and created a new project for my blog.
Step 2
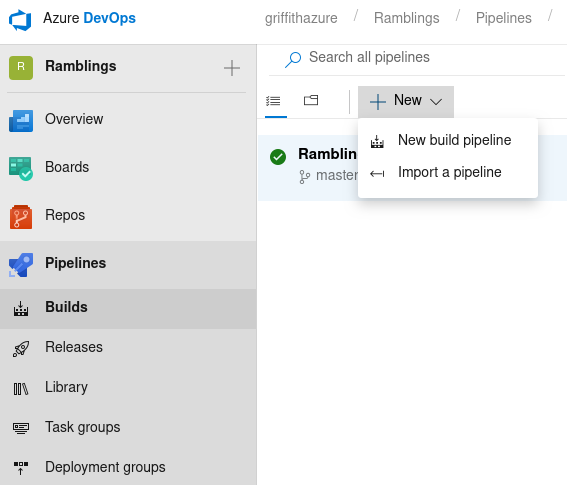
I needed to create a new Azure DevOps Build Pipeline.
Step 3
Select your source repo and if necessary go through the OAuth workflow, or provide an access token. I’m using GitHub and just followed the OAuth flow.
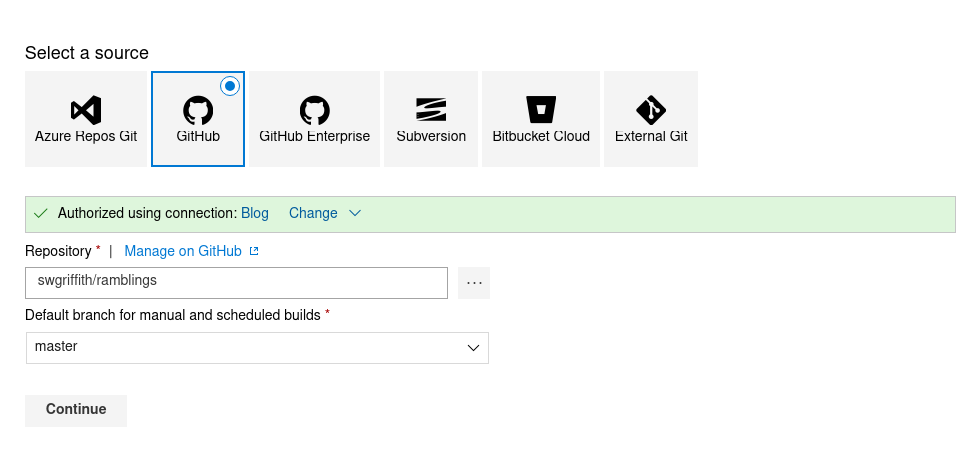
Step 4
You’ll be brought to the screen to choose a build template. This is great for common scenarios, as it will assemble the pieces you need and then you can tweak. For this scenario there is no template, so we’ll start with an ‘Empty Job’.
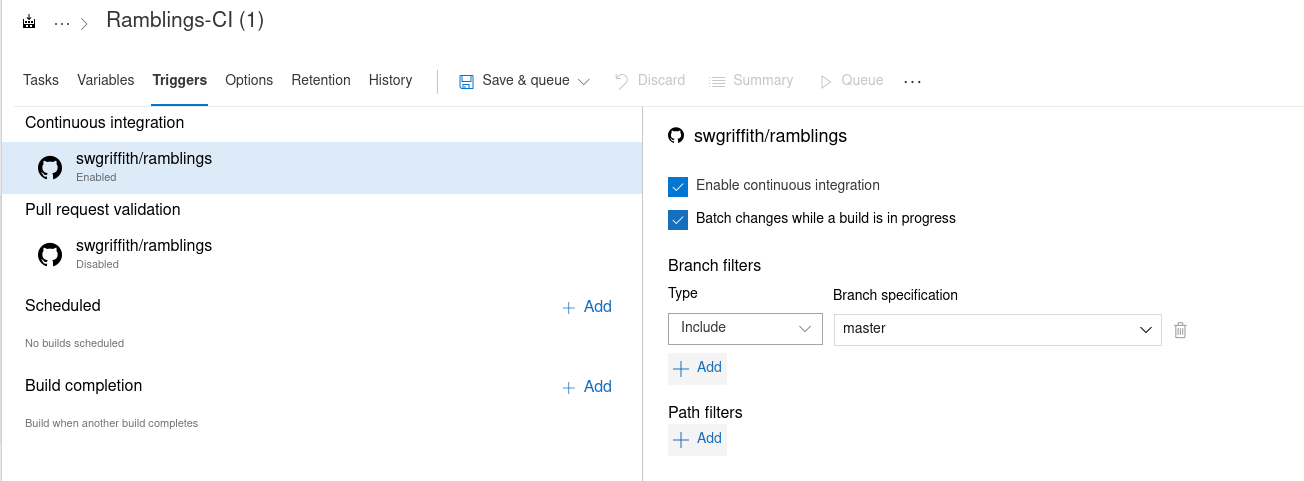
Step 5
I want this to trigger automatically on a push, so I’m going straight to the ‘Trigger’ tab and enabling continuous integration. I’m also going to enable batching of changes during a build.
Step 6
If you want you can rename ‘Agent Job 1’. Next you can click the ‘+’ from the Agent Job and add the ‘Azure File Copy’ task. As noted above, $web containers are not supported in the older version of the tool due to the non-alphanumeric character in the container name, but you can just change the version to ‘2.* preview’. Then you just need to fill in the remaining details, like I have below, and you’re ready to ‘Save & Queue’.
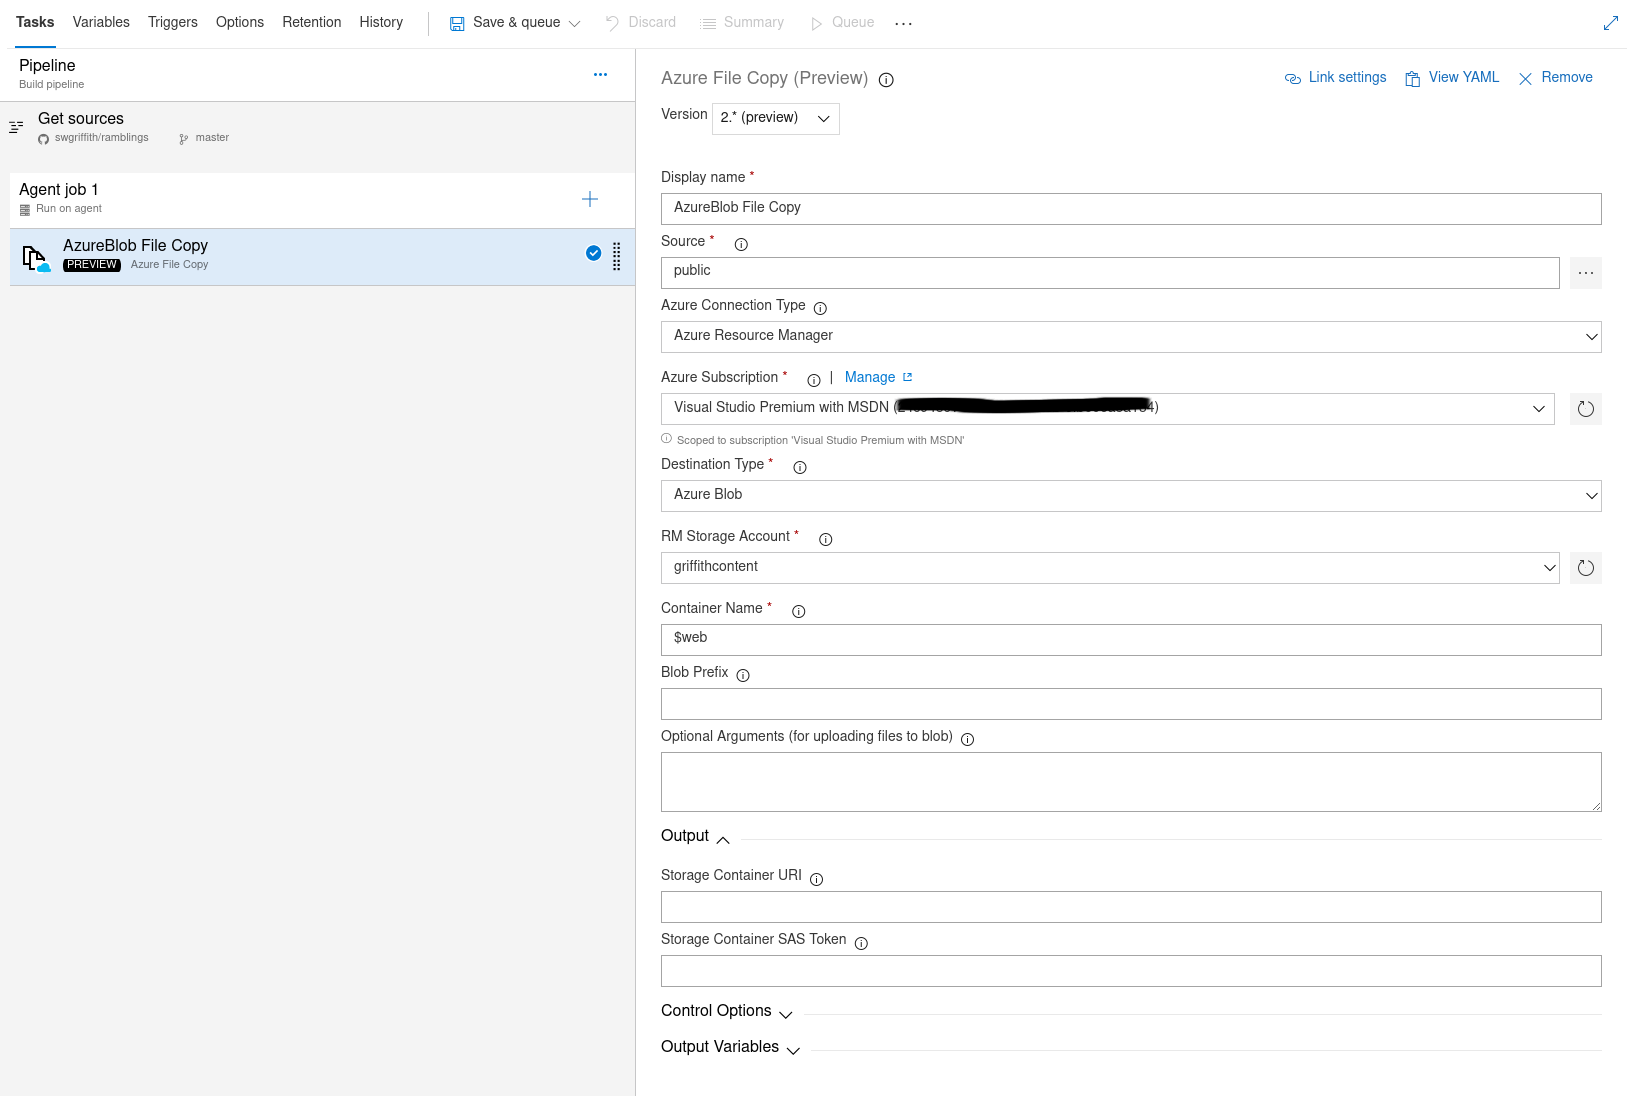
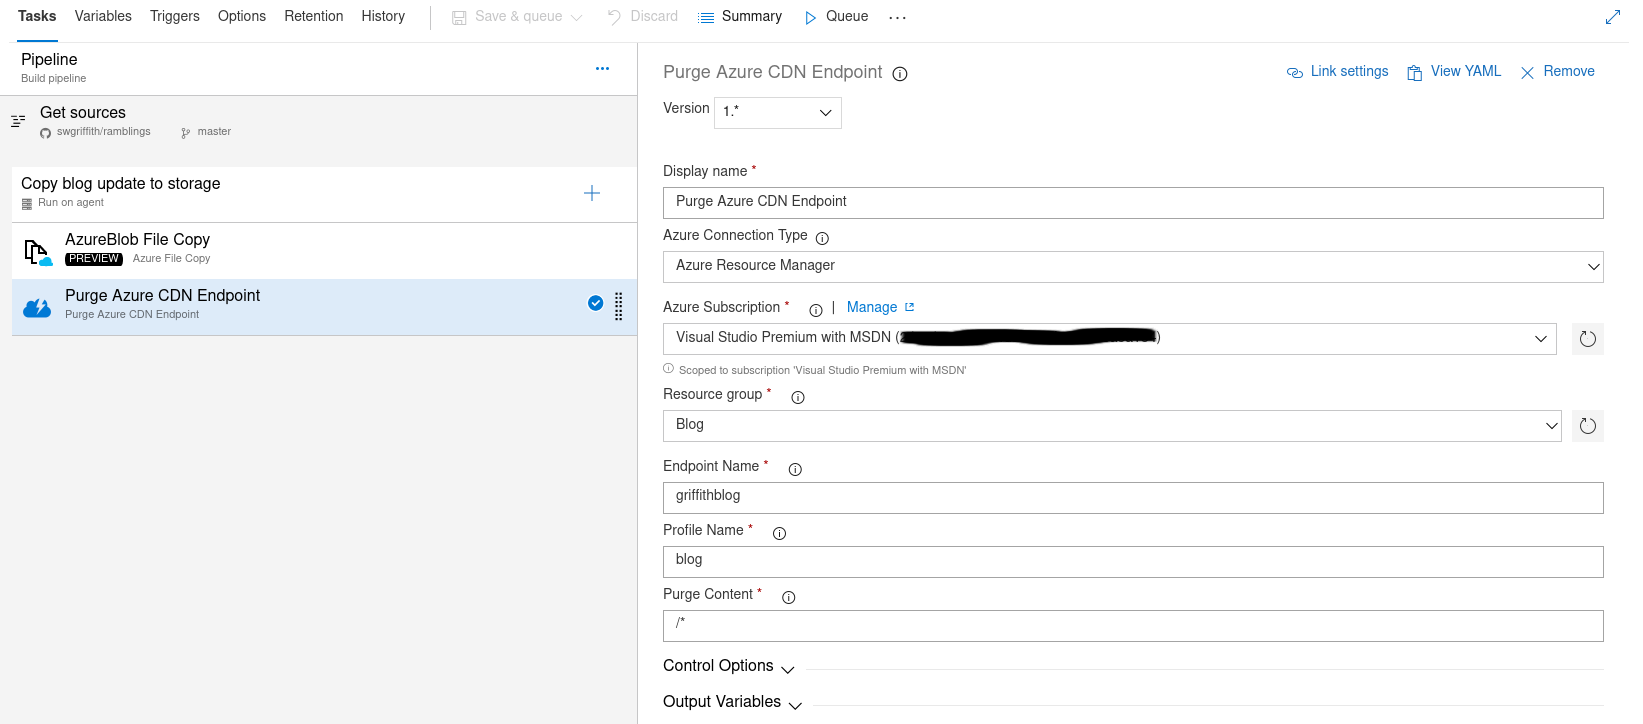
Step 7
Once I had this up and running I realized that the CDN cache can take a while to refresh, so after a new post or site update I might want to purge the cache. You can do this manually through the Azure portal, but I also found that there’s already a build task you can leverage for Azure CDN Purge (Hooray!). Just add the task and fill in the details about your CDN. Note: This task does take a little while to execute. I’ve seen it take 8-14min.
Conclusion
So far so good. Like I said, I’ll have to keep an eye on costs to make sure my understanding of the billing is correct, but it looks like an extremely cheap option to run this site. Next I’d like to optimize my development platform, possibly using Azure Container Instances and Azure Files together to create a dev environment with no local install. Once I have that running I’ll share it as well.